|
This week I have been glazing like crazy to finish all my projects before Wednesday so that I can retrieve them out of the glaze kiln on Wednesday since my last day of school is Thursday. These two projects below are just two examples of what I have been glazing. I also glazed four cups, another vase, and four plates. I am very excited to see how everything turns out as most of them have some sort of detail glaze to them. 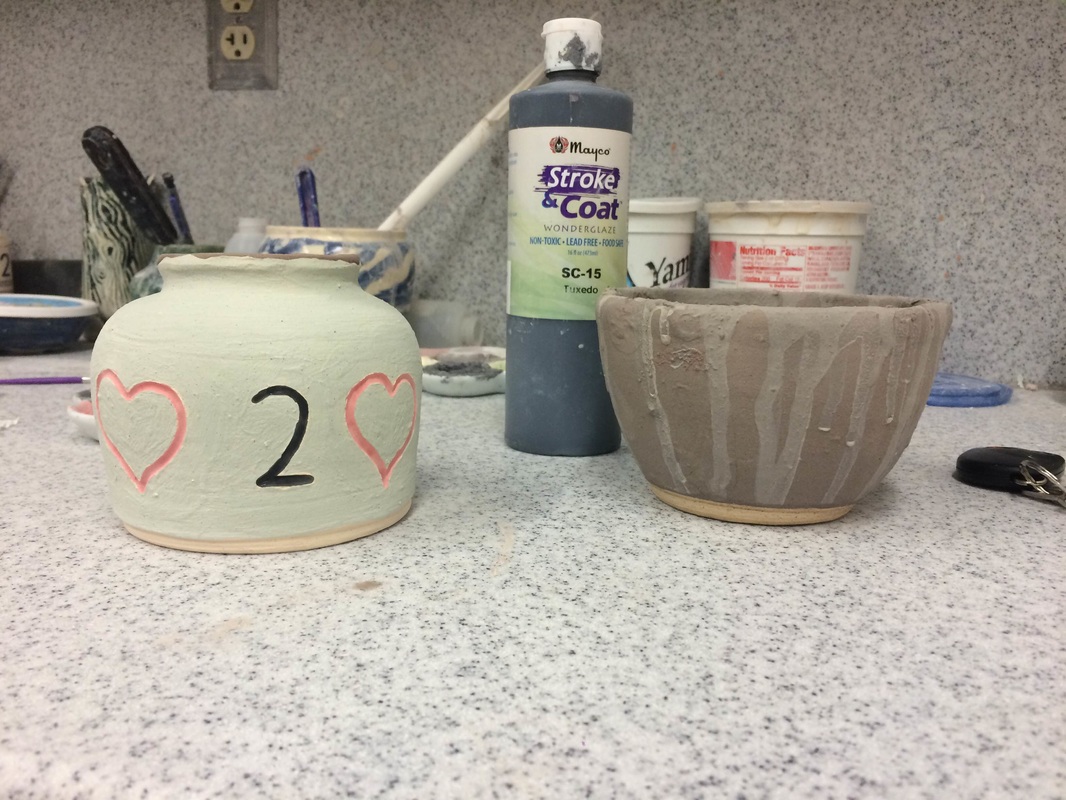 
0 Comments
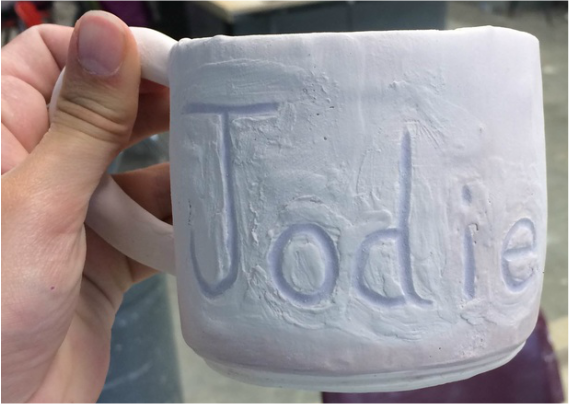
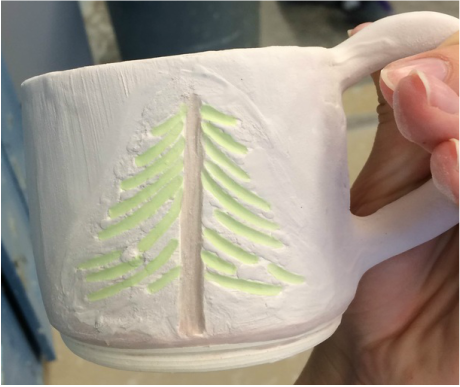
I have recently been working on glazing all the cups and projects I have produced as of late. The cups have been taking a lot of time, whole class periods even, due to the details engraved in them. Today I finally finished Jodie's cup, cutting in around the letters and tree and then detail glazing the letters and the tree.
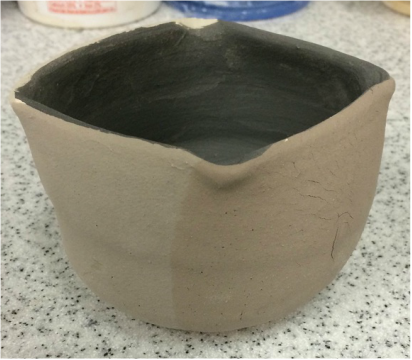
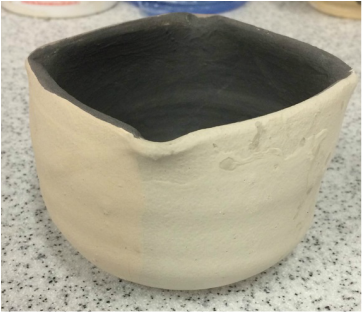
Today, I footed six different projects (only three of which are pictured). The three projects pictured below, all porcelain plates, are a set I am creating for my mom. The other three projects were all individual projects: one was another plate, the second was a vase, and the third was a bowl - altered off the wheel at the lip - I am creating for a friend.  Today I finished glazing two of my projects, and decided to do experimental glazing on them. The first project, represented by the top two photos, is a small cylinder I "squared out" at the lip, so I used four different glazes (with black in the middle) on the four different "walls" of the project: translucent blue, dark blue, translucent sea, and white. The second project, represented by the bottom photo, is a small vase I glazed in dreamscape green and then sponged white on the lip and up from the bottom (with it being heavier at the bottom) to give an inverted ombre effect.
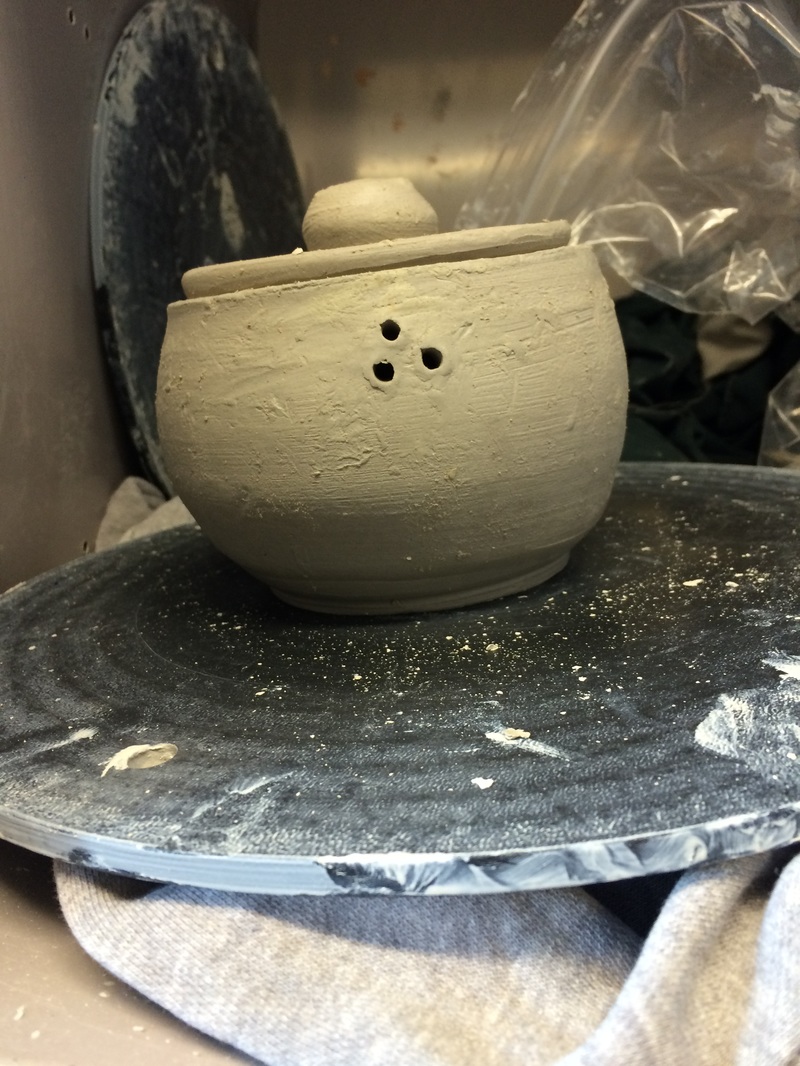
 For the past few days (and from last week), I have been creating three cups as gifts for my boxing instructor, his wife, and another fighter. I made two cups in porcelain (Frankie and Jodie's), and I made the third in vashon white. I also attached handles in the respective clay. Frankie's cup says "Frankie - Battlegoat;" Jodie's cup says "Jodie" and then has a tree carved in the other side; and Ryan's says "The Mangler." I also created a small vase-like cylinder just for fun, which can be seen on the right. 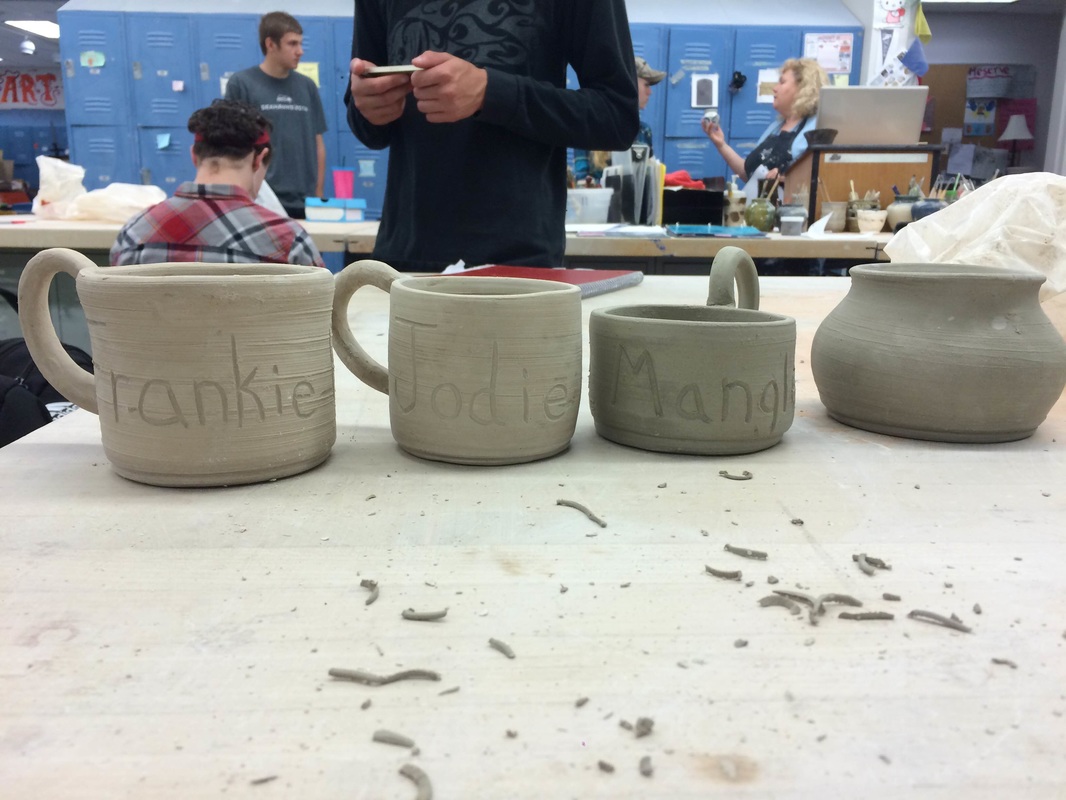 Today I finished carving out the design for my candle holder. Not all designs are present in this photo, but they are all listed below: - trees - stars - moon - fire - log cabin 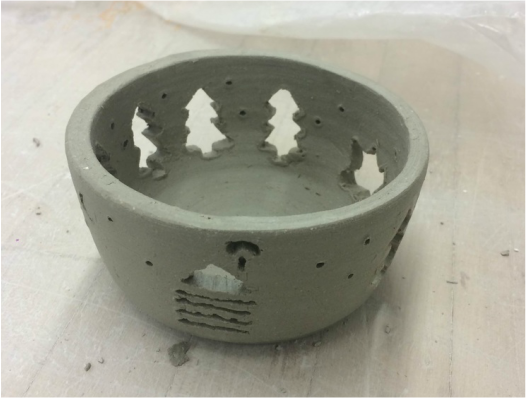 Today I took the teapot out of the bisque and then spray-glazed it with the purple glaze in an ombre fashion, having a heavier coat of glaze at the top and a lighter coat at the bottom to give it an "ombre" effect. The lid was just lightly sprayed with the glaze. 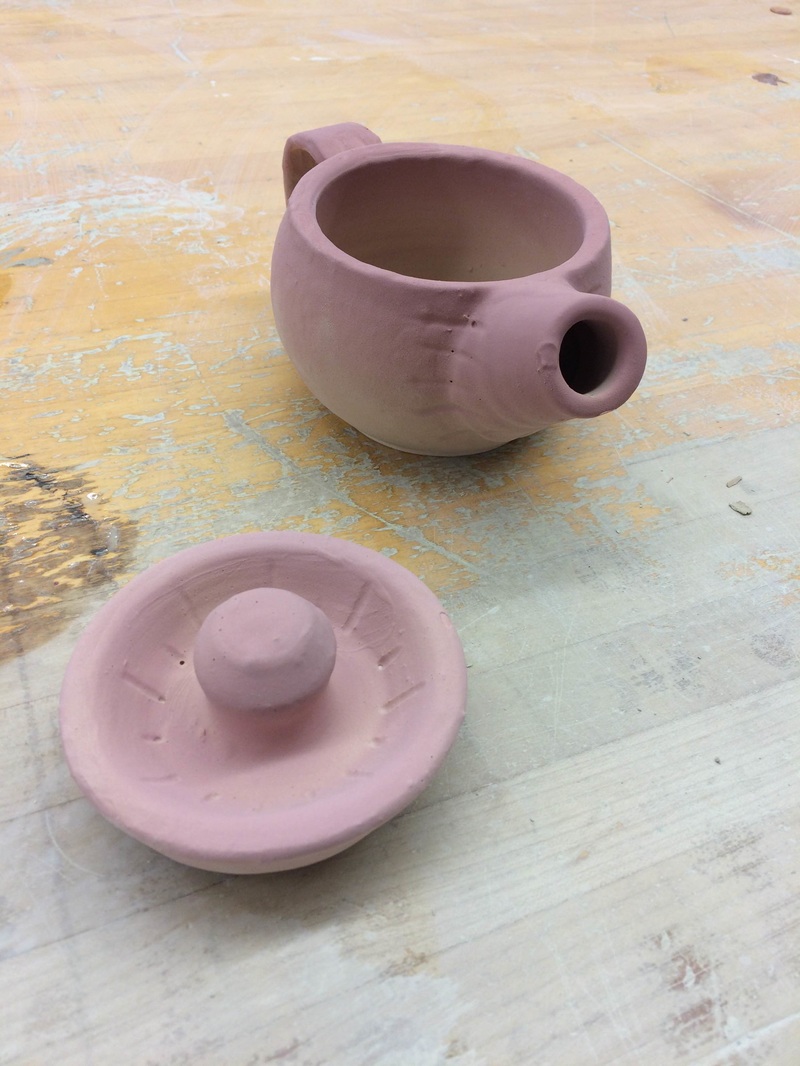 My teapot is finally finished! I pulled a handle and attached it, and then drew lines on the teapot on the handle, lid, and spout to: 1) reinforce the attachments; 2) decorate the teapot; 3) distract from the attachment spots (especially on the spout since it is less flush in some places). I will leave it out of the bag for a day and over the weekend so it doesn't go into the bisque too soft, and it will bisque Monday. 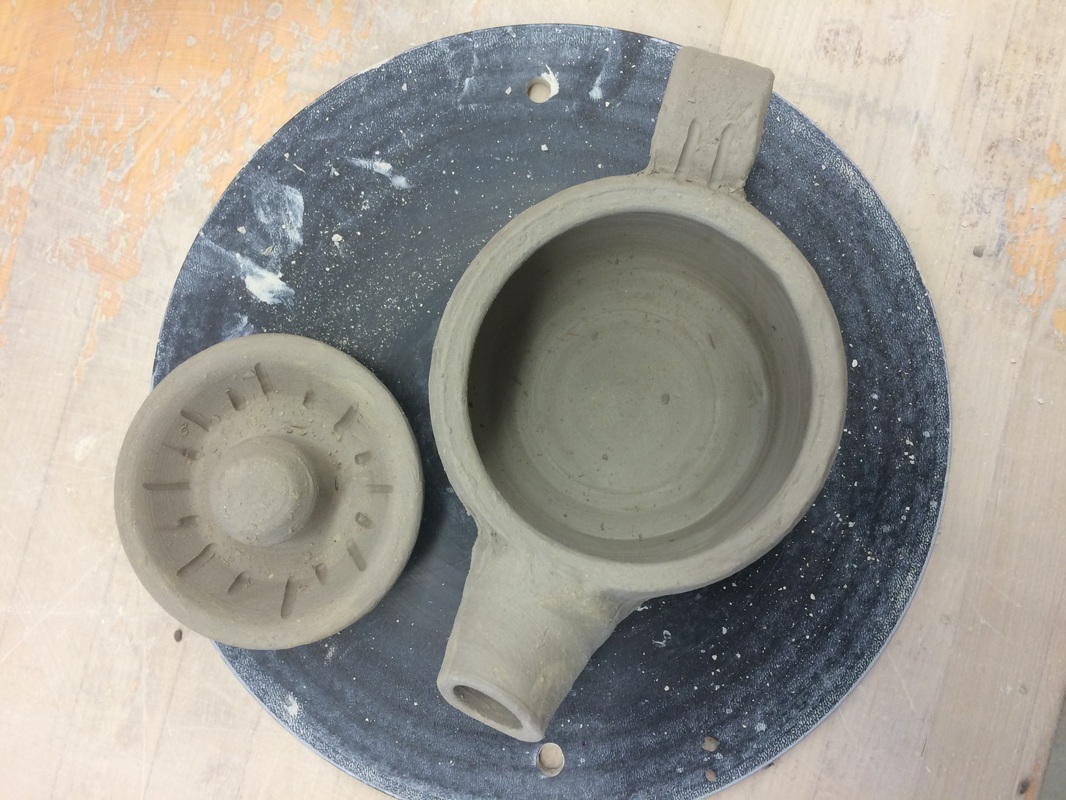 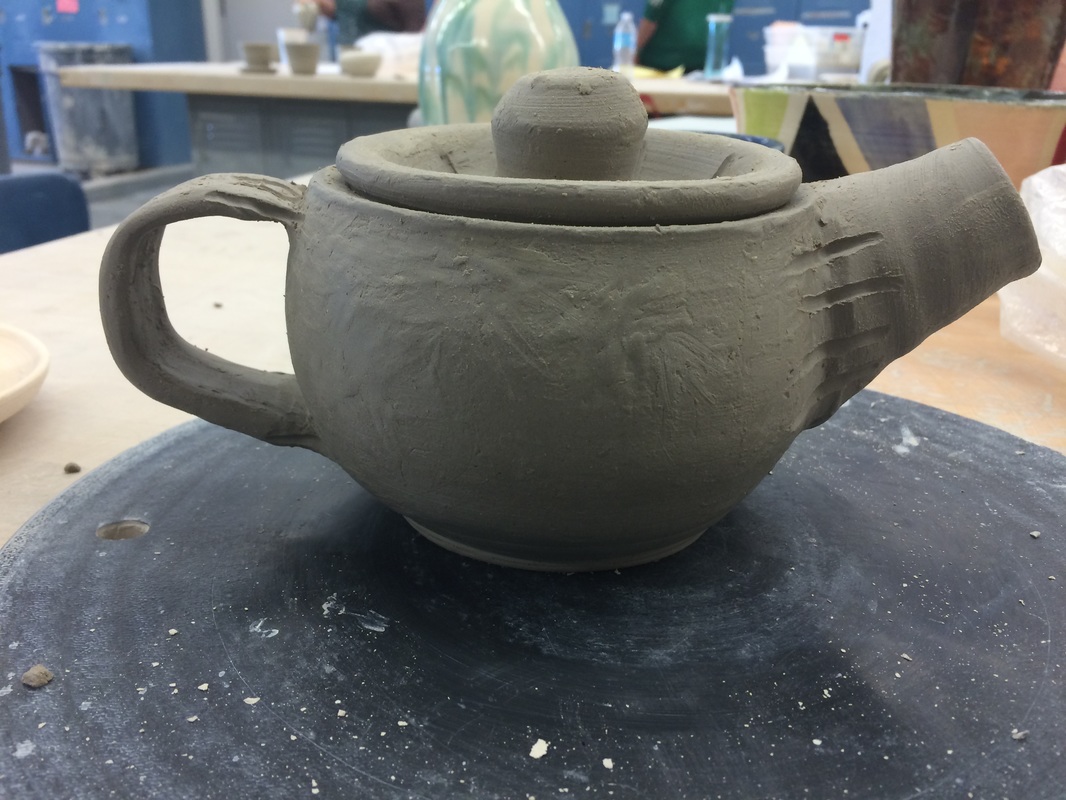 Today I added the spout onto the teapot. In order to do so, I cut it accordingly so that it would fit the shape of the body of the teapot, slipped and scored, and then rolled out small pieces of clay and filled the gaps between the spout and the body. From there I smoothed the spout out onto the body to try to make it more flush. 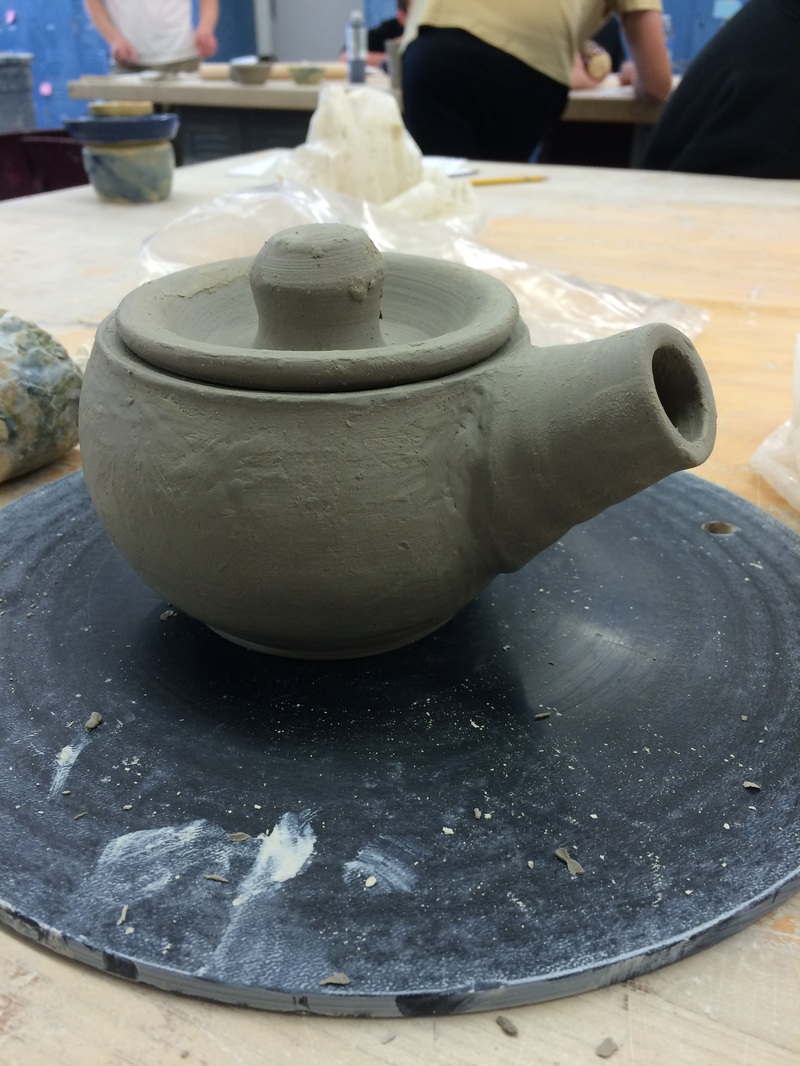 So far, I have thrown and footed both the body of the teapot as well as the lid and the spout (not pictured). I have also cut out the holes where the spout will go, and will add a fourth one to the bottom of the triangle on Monday. Over the weekend it will stay in a bag so that I can still attach the spout and handle, as well as carve the fourth hole.
|
AuthorWrite something about yourself. No need to be fancy, just an overview. Archives
June 2015
Categories |

 RSS Feed
